At work, we have a bunch of different models of devices. We actively maintain no less than 3 separate models of Desktops (1 for the K-3, 1 for 4-5, 1 for 6-8, 2 for 9-12 but these are usually a mix of the 4-5 and 6-8) and no less than 4 different Mobile devices (4 models of Chromebooks, 3 models of Laptops). Most of the Mobile devices, including the Chromebooks we get from Dell and Samsung are pretty easy to work on.
This is not the case for the Dell Laptop model Precision M2800. They are a bear.
I’ll tell you why.
Let me start off by saying: I do not like the M2800 line to begin with. It all started with the super-powered AC Adapters. If you aren’t aware, you need to use the 19.5V, 6.7A, 130W AC adapters with the M2800 line. If you don’t, the device will work, but will not charge if the device is on. Also, if the device is on, it won’t fully utilize the resources like the hard drive, effectively slowing them down. In fact, the device will run slower with a 90W adapter than with no adapter plugged in at all. It’s… kinda funny, in a “Oh God Why” sort of way.
So the title of this is “On Laptop Disassembly” and true to the point the heart of the rant is about disassembling one of the M2800’s.
The audio on this particular motherboard stopped working (which may or may not be caused by a student sticking a pencil into the audio 3.5mm jack). This requires replacing the motherboard, as the pencil tip will not come free no matter what we try.
Well, in order to get to the motherboard, you have to remove EVERYTHING else. I mean, EVERYTHING.
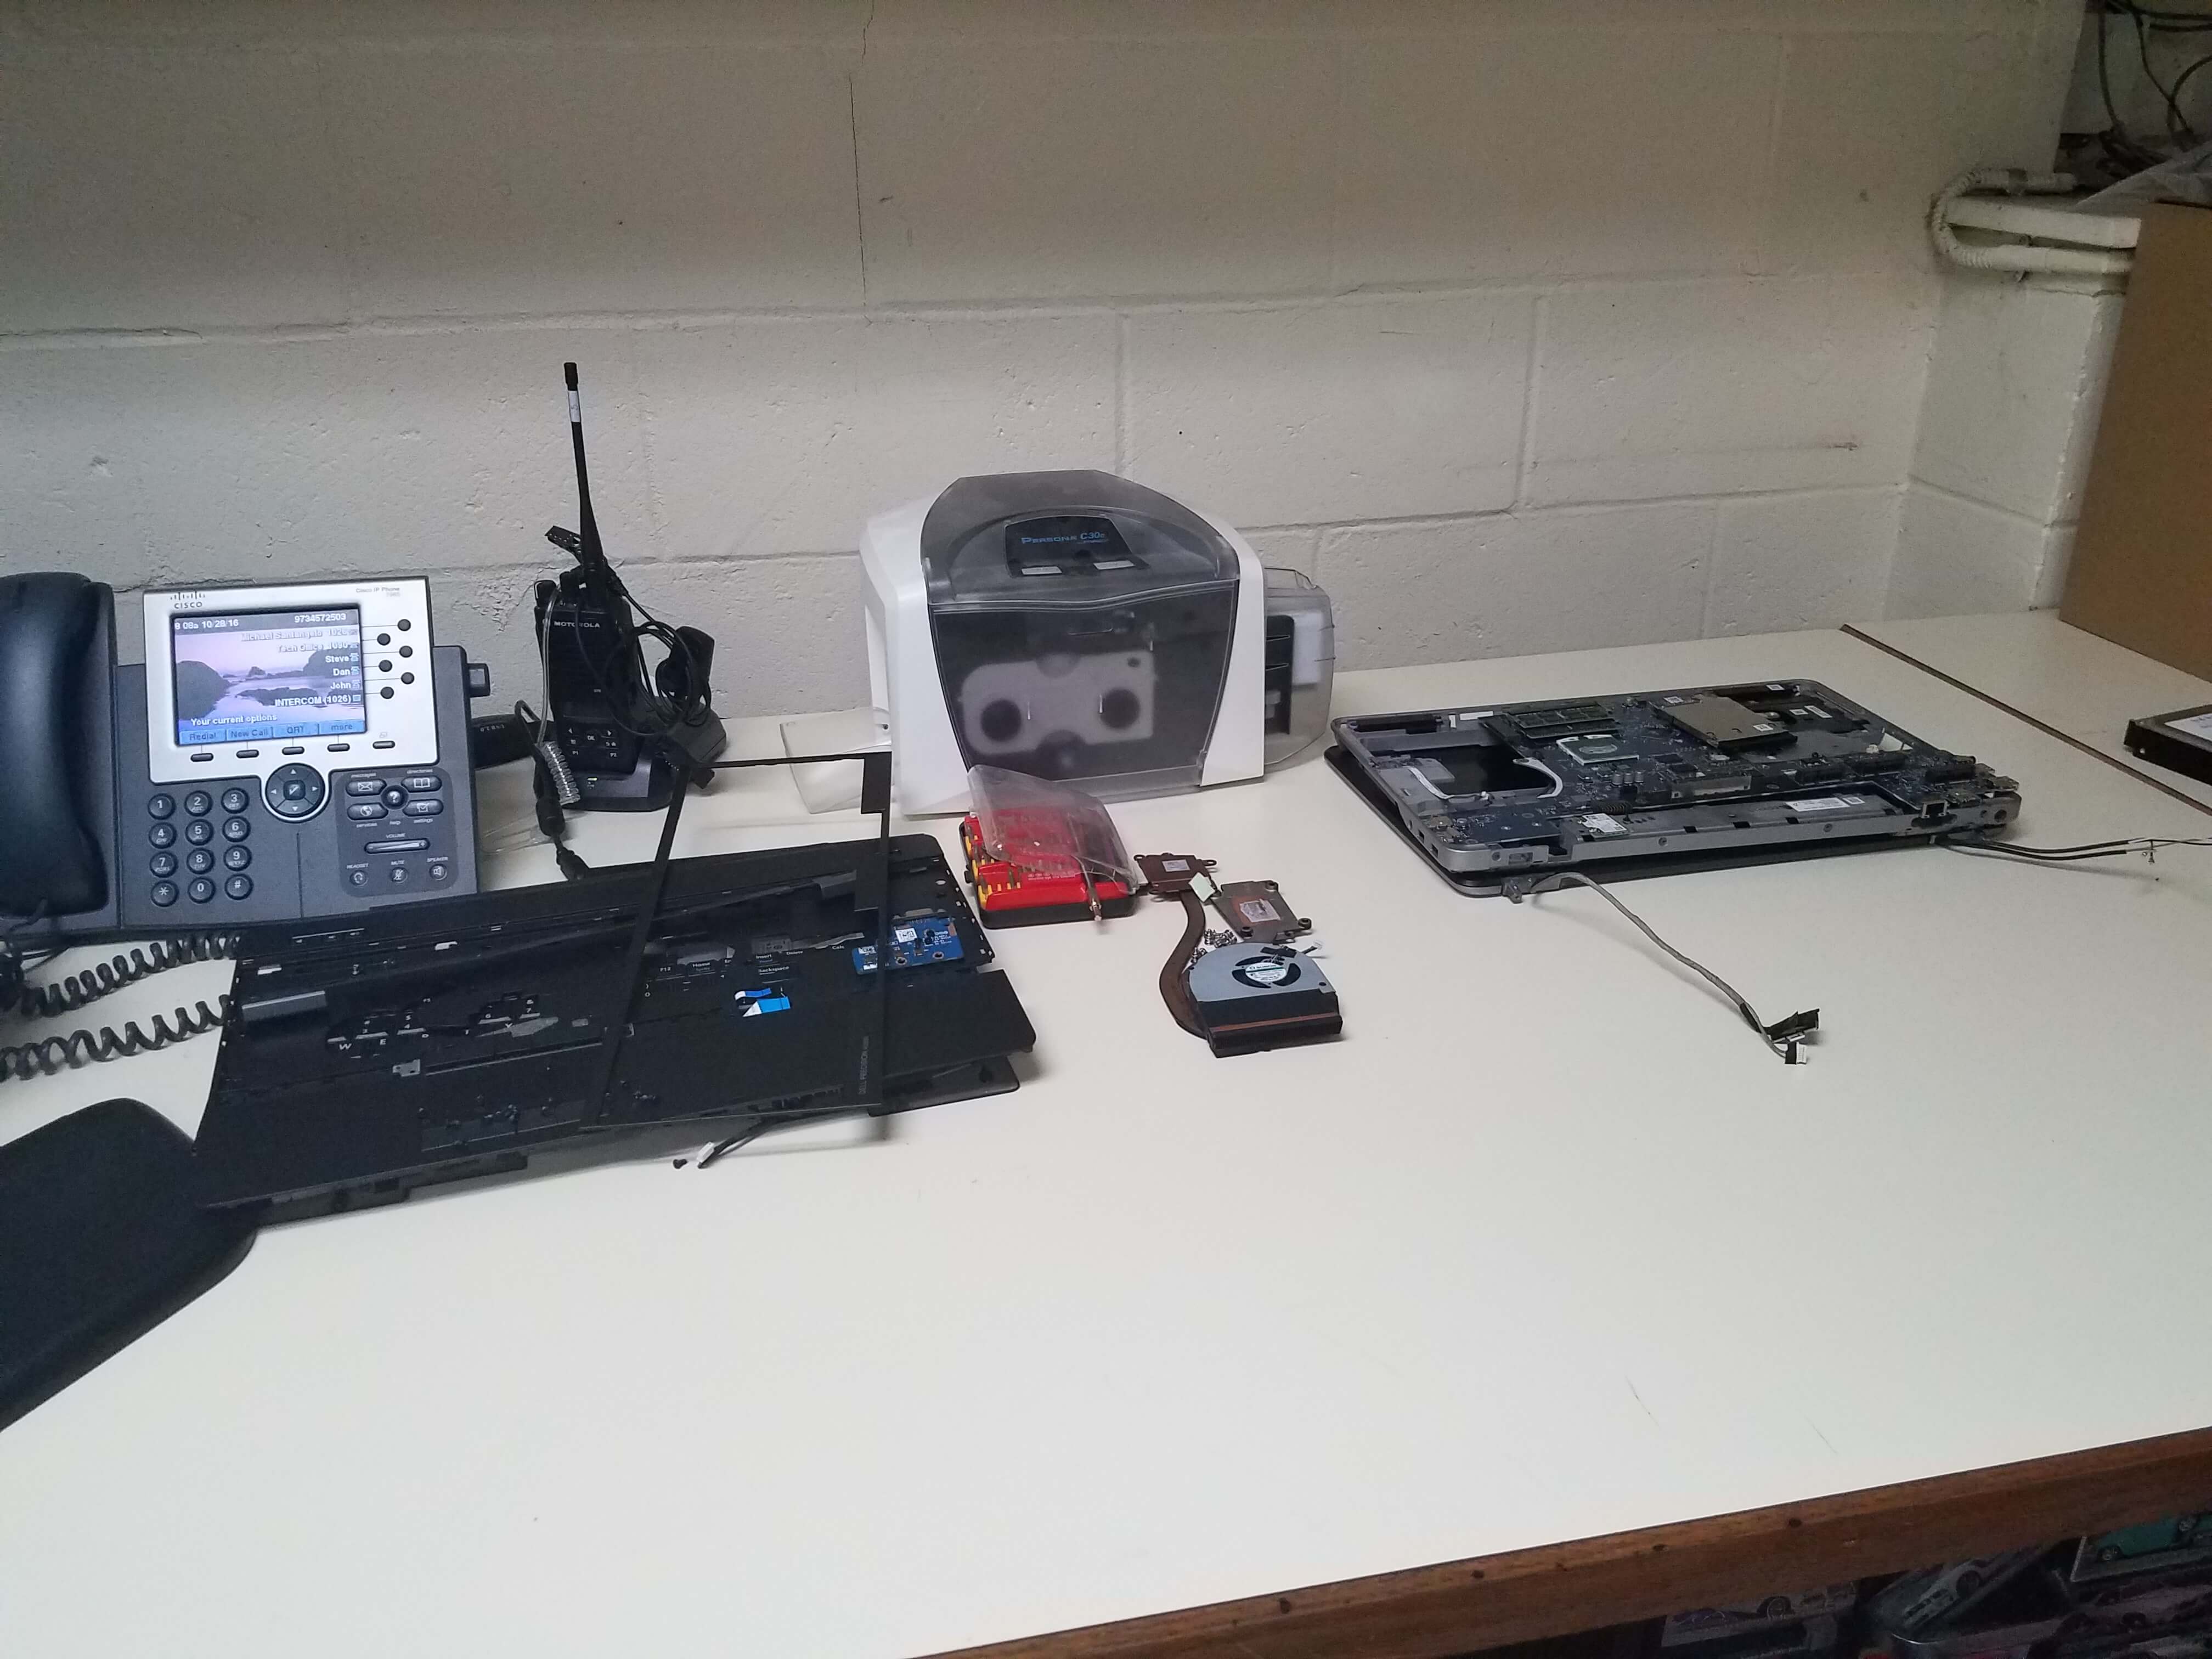
On other mobile devices from Dell you have to remove the keyboard and the bottom plastics to do it. 8, maybe 12 screws tops. The motherboard is then 4-6 screws, not including the ones for the heat sink or WiFi card.
For the M2800, you need to remove the bottom plate (4 screws), the keyboard (3 screws), the display (2 screws), the back bezel (4 screws), the palmrest (I lost count, I think 12-15 screws), the WiFi Card (1 screw), the PCMCIA-Type Slot (2 screws), the heatsink (7! screws), and then, and only then, can you get the motherboard out.
It is beyond words levels of absurd. I can’t even sometimes.
The worst part is that sometimes the indicators for where you’re supposed to put the screws back in aren’t always… clear. That is to say, there’s an indicator pointing at an area that has 2-3 screw places in it. If you don’t remember how you took it apart (which isn’t always easy if you take it apart the day you find a problematic part while waiting for replacement parts to arrive) then you will have LOTS of difficulty putting it back together.
And yeah, yeah, I know, you can look at the Dell-Provided Service Guide, but you know what? I shouldn’t need a damn manual to indicate how to re-assemble a device. It should be intuitive! It should be simple enough that anyone can do it.
I believe we have an intrinsic Right To Repair any device that we own. Dell thankfully agrees with this sentiment, and let’s be honest: the vast majority of their devices are downright friendly to work on.
It’s just this one specific model that I’ve worked on that drives me crazy.
And that was worthy of a rant because it was the 3rd one I had to rip apart this week for one reason or another.
-M, out