Hi everyone! Here’s step 2 to getting started with DogeCoin. Step 1 is Getting A Wallet and is available here.
There are multiple ways to get DogeCoins. They all basically boil down to two things: buy the coins, or mine the coins. There are two main methods for mining coins: CPU Mining and GPU Mining. There is a 3rd, called ASIC but it’s seemingly generally frowned upon by the DogeCoin community (at least, that’s the feel I get from it) so we won’t be talking about it much here (that and I don’t have any experience with it myself).
The simplest method to setup is CPU Mining. It doesn’t require any fancy drivers or application layer to be installed. All you need is a piece of software, and a place to get and store coins. You -can- setup CPU Mining to go directly to your wallet, but if you’re not in a Pool chances are your pickings will be slim to none. 🙁 To that end, I’m going to write this guide as though you’re a member of a Pool. If you’re not, I still heartily recommend the Coinium Pool.
So, let’s get started!
- Configure A Pool
- Go to your pool of choice, and create an account there.
- Login to your pool account, and create a worker. (Instructions below as for Coinium, though I assume they are the same elsewhere)
- Click “My Account” then click “My Workers”
- On the left side bar under the “Add New Worker” section, add a worker name and a worker password. Click “Add New Worker”
- Make note of the username and password for the worker. Also note, you will need a different worker per computer and device you use (a worker for each laptop, or desktop running on CPU, but also a worker for CPU or GPU on the same computer)
- Download the miner for your OS.
- Navigate to: CPUMiner. You’ll want version 2.3.3.
- Download the version for your OS.
- Extract the archive to a location of your choosing
- Configure the miner
- In Windows, I made a batch file that will run the exact command to start mining. To do this:
- Create a new blank text document in the folder containing minerd.exe
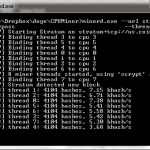
- The command you’ll want is:
minerd.exe –url stratum+tcp:// –userpass : –threads <# of cores you want to use>
pausefor example at coinium:
minerd.exe –url stratum+tcp://us.coinium.org:3334 –userpass : –threads 8
pause - Save this file with the extension .bat instead of .txt. If you can’t, then you should look up how to view file extensions in Windows and make system changes as necessary.
- I know in Unix/Linux you can make a shell script that will accomplish the same thing. That’s left for you to find out. I don’t know if there’s an equivalent on the Mac side, but I assume that there is.
- In Windows, I made a batch file that will run the exact command to start mining. To do this:
- Run the miner!
- Once you have some coins, you can withdraw them! You can set this up to occur automagically, or do it manually as you prefer. I donate 5% to Coinium and withdraw automagically every 2500 coins.
Good luck! 😀
