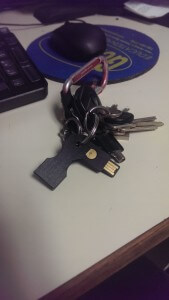
I recently picked up a Yubikey Neo from Amazon, jumping early on the bandwagon of U2F for Google.
After a few weeks I am pleased report that it is amazingly versatile and I have been able to do many great things with it.
I have already setup U2F with Google (replacing Authenticator altogether) which is amazing. My WordPress site also integrates the Yubikey One-Time-Password scheme (which is frustrating to get working when I did it, more on that below). I have also replaced the Authenticator App on my phone with the YubiAuth App. They do the same thing, except with one major difference: Authenticator shows codes immediately; YubiAuth does not show codes until you tap the YubiKey to your phone (with NFC enabled). This means codes aren’t available to just anyone. As an added bonus, since the auths are stored on the YubiKey you don’t need to worry about losing your phone and losing access. Get a new phone, install the YubiAuth app, tap your Yubikey, boom, codes are available. It’s a big relief for me since rooting a phone to install a Titanium Backup copy of Google Authenticator is always step one when I get a new phone. Don’t need to worry about that anymore! Score!
The configuration tools aren’t quite there yet. When I first wrote this, the tools were limited in their scope until you went to the command line versions. For example, the Yubikey supports OTP, Smart Card, and U2F. It doesn’t support all three simultaneously nor natively. Using the basic GUI tools you cannot enable U2F and OTP simultaneously. That being said, using the command line tool allows you to enable mode 6 which is all three modes at the same time. It’s a little confusing, and sometimes frustrating (especially when trying to set up SmartCard or OTP and realizing being in mode 6 prevents enrolling almost all the time) but once you get the knack of it, things work very well.
The Yubikey system integrates fairly well with LastPass (as reported by Nick) and does well with Dashlane as well (in that the YubiAuth app replaced Google Authenticator for new device enrollment in my Dashlane account). I used it to sign in to my desktop briefly, but it didn’t work the way I wanted and prevents RDP as far as I can tell. The Yubikey must be present in the system for you to login, but it still requires your Windows password to be entered. I was hoping that merely putting in the Yubikey would allow me to login (or pressing the OTP generator would log me in). You CANNOT log in to the system enrolled with their login system unless the key is present. No more RDP or TeamViewer access meant it just wasn’t viable for me. Still, I could see it being used at work (though enrolling for a domain user was damn tricky since the program doesn’t sort the usernames in any semblance of an order).
My one real complaint about the Yubikey was the case they sent; namely the lack of a case. They ship the Yubikey in a small envelope made of a flexible plastic type material, which isn’t really suitable for holding the unit on a keychain (which is where it’s basically designed to go). I know they claim that it’s made of super resilient materials, but I am trusting my virtual identity to the device, and if it fails then I am in DEEP trouble (I am still keeping a backup of my Google Authenticator and also leaving back-doors into systems so that I can get back in if shit hits the fan).
That being said, I did also design a cool, simple case for the Yubikey, which is available on Thingiverse here. If you have a Makerbot, the STL file is available which will allow you to import it directly into Makerware. If you have another 3D Printer I have also included the SKP file (Sketchup) which should get you in the right direction for printing it. The model was made with help of the NetFabb Model Repair Service, a Pittsburgh Caliper, and a lot of time on my end. 🙂
So, if you’re security minded I highly recommend you pickup one of the Yubikey line and get your accounts well secured. 🙂
