Hi everyone!  Here’s step 2 to getting started with DogeCoin.  Step 1 is Getting A Wallet and is available here.

There are multiple ways to get DogeCoins.  They all basically boil down to two things: buy the coins, or mine the coins.  There are two main methods for mining coins: CPU Mining and GPU Mining.  There is a 3rd, called ASIC but it’s seemingly generally frowned upon by the DogeCoin community (at least, that’s the feel I get from it) so we won’t be talking about it much here (that and I don’t have any experience with it myself).

The simplest method to setup is CPU Mining.  It doesn’t require any fancy drivers or application layer to be installed.  All you need is a piece of software, and a place to get and store coins.  You -can- setup CPU Mining to go directly to your wallet, but if you’re not in a Pool chances are your pickings will be slim to none. 🙁  To that end, I’m going to write this guide as though you’re a member of a Pool.  If you’re not, I still heartily recommend the Coinium Pool.

So, let’s get started!

  1. Configure A Pool
    1. Go to your pool of choice, and create an account there.
    2. Login to your pool account, and create a worker. (Instructions below as for Coinium, though I assume they are the same elsewhere)
      1. Click “My Account” then click “My Workers”
      2. On the left side bar under the “Add New Worker” section, add a worker name and a worker password.  Click “Add New Worker”
      3. Make note of the username and password for the worker.   Also note, you will need a different worker per computer and device you use (a worker for each laptop, or desktop running on CPU, but also a worker for CPU or GPU on the same computer)
    3. Download the miner for your OS.
      1. Navigate to: CPUMiner.  You’ll want version 2.3.3.
      2. Download the version for your OS.
      3. Extract the archive to a location of your choosing
    4. Configure the miner
      1. In Windows, I made a batch file that will run the exact command to start mining.  To do this:
        1. Create a new blank text document in the folder containing minerd.exe
        2. The command you’ll want is:

          minerd.exe –url stratum+tcp:// –userpass : –threads <# of cores you want to use>
          pause

          for example at coinium:

          minerd.exe –url stratum+tcp://us.coinium.org:3334 –userpass : –threads 8
          pause

        3. Save this file with the extension .bat instead of .txt.  If you can’t, then you should look up how to view file extensions in Windows and make system changes as necessary.
      2. I know in Unix/Linux you can make a shell script that will accomplish the same thing.  That’s left for you to find out.  I don’t know if there’s an equivalent on the Mac side, but I assume that there is.
    5. Run the miner!
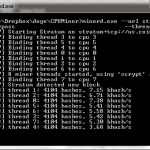
      1. Launch the batch file you made in the previous step.  If everything is working you’ll see…
      2. Untitled
      3. If you do, then you’re good to go!  Mining has commenced.  Soon (a relative term) you will have coins in your Coinium account.
    6. Once you have some coins, you can withdraw them! You can set this up to occur automagically, or do it manually as you prefer.  I donate 5% to Coinium and withdraw automagically every 2500 coins.

Good luck! 😀
Hello everyone!  I mentioned yesterday how I was going to build a guide to show you how to start mining and saving up Dogecoin, and I apologize for not posting it yesterday.  It was a longgggg day at work and after my workout at home I was thoroughly wiped.  So after sitting and thinking on the idea, I decided to split it up into multiple posts across multiple days.  Today I will bring you step 1: Getting A Wallet!  To the moon!

dogecoin


Without further delay, here’s what you need to do:

  1. Navigate to Dogecoin‘s website in a web browser.
  2. Click on the brand of OS you are using in the “Start Using Dogecoin Today:” section.  This will download the wallet installer application which will generate the necessary private and public keys (more on this later).
  3. Wait for the download to finish, then launch the installer.  During the installation you can select all the defaults, it’s fine.
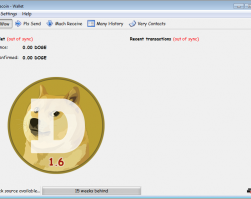
  4. Run the Dogecoin application.  It will look like this, or similar (the number may be different as it’s the version number): Wallet start
  5. Now wait, the wallet application has to catch up in the block chain.  The way crypto/digital currency works is that all machines have records of all transactions that have occurred.  In this picture you can see we are MANY weeks behind.  Just let it sit there until you have a green check mark in the bottom right.
  6. Once the wallet is all caught up, there are two mandatory steps (not really mandatory, but HIGHLY RECOMMENDED!):
    1. Click Settings, then click Encrypt Wallet.  Enter a pass phrase at least 20 characters long.  DO NOT LOSE THIS PASS PHRASE.  IF YOU LOSE IT, YOU LOSE CONTROL OF YOUR WALLET AND WON’T BE ABLE TO SEND COINS ANYWHERE!
    2. Click File, then click Backup Wallet.  Save the wallet data .dat file somewhere secure.  If you ever have to rebuild your machine you MUST HAVE the wallet data .dat file or you will lose all your coins to the great bit graveyard.  Many sad.
  7. Now you need to make an address so that people can send coins to you.  Click the “Much Receive” tab and then click “New Address”. Enter a name for the address in the Label field, and click OK.  You should have to enter your pass phrase to continue. Hint: If you post your wallet address here, I will send you a few coins to get you started and verify that you’re all setup. 🙂
  8. Congratulations, you now have a wallet, albeit an empty wallet.

Stay tuned, sometime over the next few days I will make a post about how to start mining the simple way: CPU mining in a pool.  Follow up will be accelerated GPU mining in a pool.

I heavily recommend you mine in a pool.  Solo mining is not really worth it, unless you have a LOT of hardware on hand.  The pool I use is Coinium, and it’s a great little place with fairly regular block discoveries and good pay.

Good luck, newbie Shibe!

Hello everyone, it’s been a while so I’m bringing you some info about what I’ve been doing lately. I’ve converted my two laptops and desktops at home into Dogecoin  miners!  The machines are sitting there, plugging away and trying to calculate hashes for blocks for dogecoins.  These dogecoins are digital (crypto) currency which can be traded, used as tips on websites like Reddit, or hoarded in hopes of it skyrocketing like BitCoin did.

So far, after about half a month of mining I’ve netted just over 28,000 dogecoins (thanks for pointing out my typo Adam!) which I have spent on various things including a vanity email address (talesofatech suchemail.com), tips on Reddit for people trying to spread the word, charity causes, etc.  I am saving up for purchases on places like Treats.io & ShopDoge where you can get Amazon and Steam gift cards.

Pretty neat stuff if you ask me!

I will be writing up a guide on how to get started mining when I get home tonight, so look there to find it if you’d like to try it yourself.

If you’d like to donate (which would make me <3 you) my donation address is: DF9yjBWBiZJNFKMAYZZ8nuJCSHMz3U9Rfp (DogeCoin only, and wallet 1.6 or higher only, please).

SOPA, copyright voluntary agreements: Hollywood lobbyists are like exes who won’t give up..

From the they-just-don’t-get-it department, we bring you more copyright shenanigans from the big money holders in Congress and their best buddies: the media industry.

It’s just a lesson that we, the content consumers, must be ever vigilant if we wish to prevent people like them from destroying sites that we use.

They aren’t doing it directly right this time though, they’re taking a very circuitous route.  Instead of attacking Google or Reddit or your favorite social media platform, they are instead following the money (something they are VERY good at): making back room deals with payment processors and advertising companies.  Instead of having offending content removed from a site (which is what the DMCA originally allowed for) they are now trying to have sites completely shut down (which is what the original SOPA measures tried to do) by having their funding and revenue streams become wastelands. They are trying to have pages removed from search results, stripped of domain names, and have all their fund sources removed.  This would essentially (and effectively) kill off the site.

And it’s all being done voluntarily.

This is where things like cryptocurrency make a difference.  If we can start accepting different forms of payment that don’t necessarily need to pass through the hands of big banks and payment processors and credit card companies then we can prevent this sort of stuff from happening.  At least, that’s what I hope.  Fingers crossed.

I may not care that much if Facebook were to go up in flames, but if Reddit or Google were to disappear I think we could all agree that the internet would be a vastly different place.

I’ll keep updating with new posts as information comes in.  If I can find information on which companies are making these backroom deals I will let you know so we can all actively try to avoid them.

Until then, remain vigilant.

Protect one of our greatest inventions and resources: the open, free internet.

Cheers.

-M

Yay for NJ state government regulating something it has no business regulating!

I’m not talking about cars in general, since government regulations regarding safety and security in vehicles is pretty important in my opinion.  I am, however, talking about the government regulating and controlling how I spend my money.  Once the money enters my wallet, no one, anywhere, anyhow, EXCEPT ME, has a right to tell me how I can or cannot spend MY money (with the exception of blatantly illegal things).

To tell me that I cannot go to Tesla Online and buy a car directly from them is insulting to me and a slap in the face of Tesla directly.

NJ, I am ashamed.  What possible reason could you have for this?  There’s NO logical reason for this.  The only thing I could potentially think of is that Tesla didn’t pay off the right people.  It’s absurd.

I don’t have any plans (nor really the finances) to be able to buy one of these any time soon.  That being said, I still don’t believe the government has ANY right to tell me that I can’t or regulate them to have to be sold through some dealer instead of directly.  Ugh.

New Jersey Becomes Third State To Ban Tesla’s Direct Sales Model | TechCrunch.

So today is Tuesday, the last day before a glorious 5 day vacation of tinkering, video gaming and pure relaxation.  That being the case, we can only expect one thing from work: CRAZY TICKETS OF CRAZY!

Here’s the highlight of the morning shift:

Ticket Details: ” I am having trouble converting the “B” side of a DVD so that it can then be uploaded to the lcs.”

Ok, no big deal, usually we have a few problems like this every year where a disc is too badly scratched or there is some sort of crazy copy protection.  No big deal.  I walk over to the building (good christ is it really 12 degrees outside? It was 17 when I arrived at work.  NOT COOL NATURE.)  I talk with the user and don’t see any problem with their process, only the end result.

They pop the disc in, select the files, rename them as usual, see that the estimated length is appropriate, and click convert.  About an hour later they’re presented with files, but they’re all way too short to be right (we’re talking 5 minute output for a 45 minute input).  So I walk over to the desktop that does the conversion and I’m…. confused.

I pull the disc out and walk over to the user.  I turn it over to them and this is the conversation that occurs:

Me: “Hey <user>, someone’s written on the B side of the disc with a sharpie.”
User: “Well yeah, I did, that’s how we keep track of who owns it.”
Me: “Well, yeah, I get that, but how is the computer supposed to read the disc through the sharpie?”
User: *eyes go wide* “Ohhhhhhh.”
Me: “Yeah.  We need some rubbing alcohol.”

A few minutes later we’ve cleaned and polished the discs off.  Lo and behold, they work.

Lesson Learned: Never, ever, ever, expect a problem to be as cut and dry as you expect.  As technicians if we go into a scenario expecting certain parameters we can be blinded to the reality of the situation.

Wish I had taken a picture.

Oh well, that’s a lesson for another day.

So, we’ve been having problems with our Buffalo WZR-HP-G300NH Rev 1 running the last beta firmware (V24-SP2 build 19484 beta) from 8/9/12.  It’s been showing signs of problems lately, specifically with WiFi dropping out seemingly at random and preventing clients from reconnecting until we reboot the box.  A very frustrating problem to have, to say the least.

The plan was to go ahead and upgrade, since the router is out of warranty as of 2 months ago.  I had a couple in mind, specifically two Asus ones (RT-AC66R and RT-AC68R).  They look pretty awesome, both support DD-WRT, and are pretty full featured (even without DD-WRT).  However, I figured that instead of buying a new one I would at least try factory resetting the current one and then reprogramming it.  I wanted to give it a go, so after work I sat down to get it done.

While I was copying down settings and information, I stumbled upon a thread ( Link ) from July of 2013 that basically had the same issues.   The end user had grand results upgrading to standard DD-WRT (“And I am pleased to report that, near as I can tell, not only is my Buffalo router working, but it is working MUCH BETTER (no more dropped wifi connections) than before the upgrade. Yippee!”).  I was confused though, because the latest version of DD-WRT for my router was listed as DD-WRT v24 preSP2 Beta 14896 from 2010.  That was confusing.  Reading more into the thread, he found that there was a sneaky place that BrainSlayer was putting the firmwares and that the website wasn’t fully updated ( Link ).  Looking at the folder structure I determined that I could navigate my way to a more recent version than the 5/27/13 revision that was linked into the forums.  I found my way to a build from 2/19/14 (Rev 23598) which is located here: Link.  I downloaded both, even though from reading I would only need the Buffalo to DD-WRT one.

So I set upon flashing my Buffalo router.  I did a factory reset first, as I always do.  I then uploaded the firmware and waited.  And waited.  And waited.  10 minutes later, it was still blinking red.  I waited another 10 minutes.  Still blinking red.  I unplugged the router, waited 30 seconds, and plugged it back in.  The worst thing I could have hoped for: Solid Green Power, Solid Red Diagnostic lights.  Every 45 seconds, all lights would flash and the thing would reset.  A dreaded ‘brick’.  Brick is in air quotes of course, because I don’t like the parlance of brick being misused.  Brick to me means a device which is unworking and unrecoverable – basically a fancy paper weight.  I severely borked my router though, because there was still a way to recover it.  Thankfully I had a spare router handy, and plugged it in, and got the apartment back up and running.  Time for dinner first.

So after eating (yummy lentils soup!) I sat down at my desk and reviewed the instructions for getting a bricked router back up and running.  The steps and guides were fairly incomplete and didn’t work for me at first.  Here’s the steps I had to take:

  1. Get your router’s MAC address.
    1. Look on the side of your router for the SSID sticker.  The SSID is your MAC address.
    2. It will be in the format ************ (12 hex characters, A-F and 0-9).
  2. Make sure you have a router firmware available.  Anyone should do.  I used the DD-WRT upgrade firmware instead of the DD-WRT from Buffalo firmware nor the Buffalo firmware directly.
  3. Unplug your router and all cables.
  4. Setup a static IP address on your computer
    1. IP: 192.168.11.2
    2. Netmask: 255.255.255.0
    3. Gateway & DNS: 192.168.11.1
  5. Setup a static route to the router (I did this in Windows, steps will likely be different in Mac/Unix environments)
    1. Method 1: ARP
      1. Open up an admin command prompt
      2. Type in “arp -s 192.168.11.1 **-**-**-**-**-**”
      3. The *’s should be filled with your MAC address from step 1.
    2. Method 2: netsh
      1. Open up an admin command prompt
      2. Type in “route print” and look for the interface list.  Find your primary device.
      3. Interfaces
      4. Type in “netsh interface ipv4 add neighbors xx 192.168.11.1 **-**-**-**-**-**”
      5. The xx should be your interface number from above, and the *’s should be filled with your MAC address from Step 1.
    3. Method 1 was hit or miss for me.  Method 2 worked every time.
  6. Get ready.
    1. Plug ONLY your computer back into the router.
    2. In your admin command prompt, type “tftp -i 192.168.11.1 put ” but do not press enter yet.
      1. You may need to install the Windows TFTP tool or find one on the internet.
    3. Plug the power back into your router.
    4. WAIT 10 seconds (1 Mississippi, 2 Mississippi, …. 10 Mississippi).
    5. Press enter to initiate the TFTP.
    6. Hope for success.  If you don’t get a success message, go back and disconnect everything and start again with this process.  If you get a success message WALK AWAY FOR 15 MINUTES.
    7. After 15 minutes go and look at your router.  If you’re lucky (as I was) you’ll see blinking lights indicating that there’s traffic and activity.  Hurray! You’ve unbricked it.

Huzzah!  I now have DD-WRT running on my router!  Everything is going smoothly finally.  Time to wait a few weeks and see if everything will cooperate.  I really would like to avoid paying for a new router if I can at all.

Tales Of A Tech has recently undergone some major restructuring and changes.

You may notice that we are now https; https is a great thing for everyone involved here.  This is a Comodo PostiveSSL certificate that I will have for at least a year.  We are also no longer getting our DNS from GoDaddy – we have switched to Namecheap following the nastyness after the N Twitter fiasco.

You may also notice, that https://talesofatech.com no longer brings you directly to the blog.  That is by design!  I plan on doing a lot more than blogging with this website.  To go to the blog, you simply go to https://talesofatech.com/blog.  There are a few other things too!

The Tales Of A Tech store will be up soon (I mean, it’s up now; but there’s very little there at the moment) and you’ll be able to request services such as hardware repairs, troubleshooting, diagnostics, photography, etc along with payment processing for the above.

The Tales Of A Tech project management system is up now, but you won’t see it unless you request a service that requires it (such as web development or what not).

Things are moving forward! 😀